7 min read
Give Snow Peas and Snap Peas Separate Picking Sides
Label two kinds of edible pod peas at the support and compare the stage at which each gives you its best harvest.
On this page
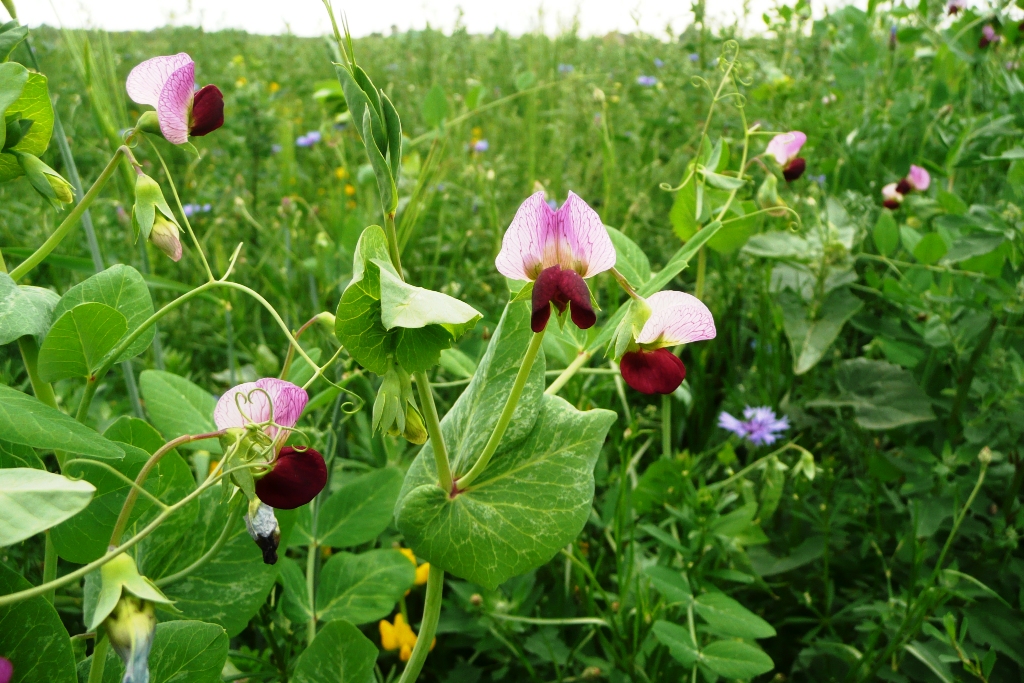
A snow pea and a snap pea can be difficult to distinguish on a crowded support just when you are deciding whether to pick them. The flat pod on one vine may be exactly what you want. The next pod might need a little more time to round out. Set the plants up so you can read the label and reach each one without pulling its neighbor out of the way. A shared trellis can make efficient use of a short bed if you put the labels where the mature leaves cannot hide them.
Snow peas are typically harvested as flat, tender pods before the seeds become prominent. Snap peas are generally picked once their edible pods have filled somewhat while the walls remain tender. Shelling peas are a third type: the seeds are the intended harvest, and the pods are normally discarded. Choose one named snow pea and one named snap pea for this comparison. Keep each packet and read what its supplier says about harvest size and support. Keep the rows labeled after flowering so that you can judge the pods by the standards for each type.
Build a support with two visible labels
Look at the mature height on both packets. Give a climbing variety a secure support that fits the space. Shorter plants may use a low frame or brushy supports while tall vines need more vertical room. Choose fittings and stable anchors appropriate to the site, with no loose line across the path. Put the support in early so you do not have to push stakes through roots later. A two-sided structure can work if you can reach both faces without stepping into wet soil or bending productive plants.
Consider placing each cultivar on a separate section of the same support. A break of a few openings between them gives you a visual marker, or you can position the snow peas on one side and the snap peas on another where the vine paths will stay identifiable. Label each planting section at both ends. A label right at the base can become invisible under foliage. Put another one where you can still see it once the vines reach their mature height. Make a simple note about which direction each row follows along the support.
Measure the route from either end. The plants mostly stay close to their supports, but leafy growth can catch on sleeves and baskets. Keep enough room near the face you will use for picking. An area where you can turn around makes it easier to inspect from both directions. Notice which side receives light, and reserve a place where later crops will not be shaded for too long. Some variety differences will depend on the season and site. Keeping the two plantings close in exposure makes it easier to compare their harvest stages.
Sow in the cool growing window
Peas are generally grown in a cool part of the season. Sow in workable soil according to local timing and the seed packet, leaving a chance for flowering before long hot weather. Use the appropriate depth and spacing. Give both rows the same useful soil and moisture where practical. If the two packets specify different mature sizes or spacing, respect those differences. You are comparing how each one grows and tastes in a normal planting, not asking two distinct cultivars to make identical vines.
Water gently after sowing and inspect the row during emergence. Keep surface weeds from competing with young plants. If a patch fails to come up, check a few seeds and look at the condition of the soil before filling the gaps. An overly wet area can remain a poor place for another start. Where one side of the trellis becomes much warmer and drier, note that difference. It may help explain why one type later produces pods earlier, even if both had the same sowing date.
Guide young shoots toward the support once they extend. Peas attach with tendrils when they find a usable structure. Keep the thin stem clear of tight ties and avoid dragging new shoots across each other. Move a branch only while it remains flexible. If one variety grows faster, check whether it has crossed the empty space you left between the sections. Keep the main vines traceable as long as possible. You can pick an occasional obvious pod across the gap by following it back to its stem and label.
Sample the flat pod first
Look at the snow peas shortly after the first flowers. Check a pod just as it reaches the cultivar's expected length while the seeds are still small. Pick a sound sample and compare the thickness of the walls with the texture you want. Thin snow pea pods usually bend easily while they are tender. Use your kitchen test and packet advice to select a working harvest size. Leave a small pod another visit if you need more evidence, but remember that warm days can move it toward a tougher stage quite quickly.
Hold the vine while taking the pod. Pea stems can tear if you pull hard against them. Use clean scissors where helpful. Check several positions, including beneath leaves and on the back of the support. A group of flat pods can be almost invisible against leafy stems. Put them in a separate shallow container or one clearly marked side of your basket. Keep only sound pods and apply normal produce handling when preparing them. A small group compared at the same opening of the season can tell you whether to pick this section earlier next time.
Do not assume an older flatter pod is still at the texture you wanted. Feel it and take a sample if necessary. If the seeds have become prominent and the walls tough, adjust timing. A ready snow pea and a not yet ready snap pea can look confusingly similar in the row. Their labels and the part of the vine you have just followed are the more reliable guide than the direction the pod happens to hang.
Let the snap peas plump without losing tenderness
Wait until a snap pea pod has developed a plumper shape while the wall remains crisp. Look at the variety's stage and take one sample before moving through the whole row. A very tight pod with hardened seeds can be past the point you intended, and a very immature one may not have the same eating quality. Take a comparison at two stages a few days apart if the crop allows. Mark the day and the weather rather than assuming the same number of days between pickings will suit every week.
Keep the batches separate if you want to compare their usefulness. Note whether the earliest snap peas were on a brighter side and whether the snow peas were easier to find. During a warm spell, visit more often and check which pods would be easy to miss. Keep the plants appropriately watered as they flower and develop pods. A small row regularly picked can offer more tender produce than a larger one left until all its pods have filled at different rates. Capture the timing with a few brief notes instead of counting every pod.
Check the two sections on the same morning
Carry two labeled containers and go straight to the first mature pods on each side. Compare one from each row that has reached the stage you expect for that type. A flat but wide snow pea may be ready on a day when the largest snap pea is only beginning to fill. Take both indoors separately and look at the shininess of the pods and the size of the seeds when you open a sample. That comparison is easier to remember than an isolated date. If many pods have become overgrown, start at the lower part of the support during the next visit, where the early ones are likely to be.
Give the two varieties their own harvest dates on the label. A short cool spell can slow several of the developing pods at once, and a later warm stretch can shorten the useful interval. Enter the actual days you picked and how much was tender rather than only the estimated maturity date from the packet. Compare the record with the side of the support that dried first. In the following year, use those notes to decide whether to stagger sowing or simply keep both varieties together with separate harvest checks.
Take down a layout you can repeat
When plants finish, remove old material as appropriate and keep the two strips marked until the last useful pods are gathered. Note whether tendrils bridged the gap between varieties and whether the second side was reachable. You can widen that gap or move one type to a separate support next season if identification was more work than the trial justified. If both were useful, repeat the arrangement where the light and route made it simple. Keep the packet and the harvest description together so your hands know which stage to look for when the next pods cover the trellis.
Further reading: University of Minnesota Extension guide to growing peas.